How to Build a Cheese Board That Actually Gets Eaten
Skip the guesswork. Here is how to pick the cheeses, plan portions, and arrange a board that looks generous and tastes even better.
 By Theo Brandt
January 10, 2026 · 5 min read
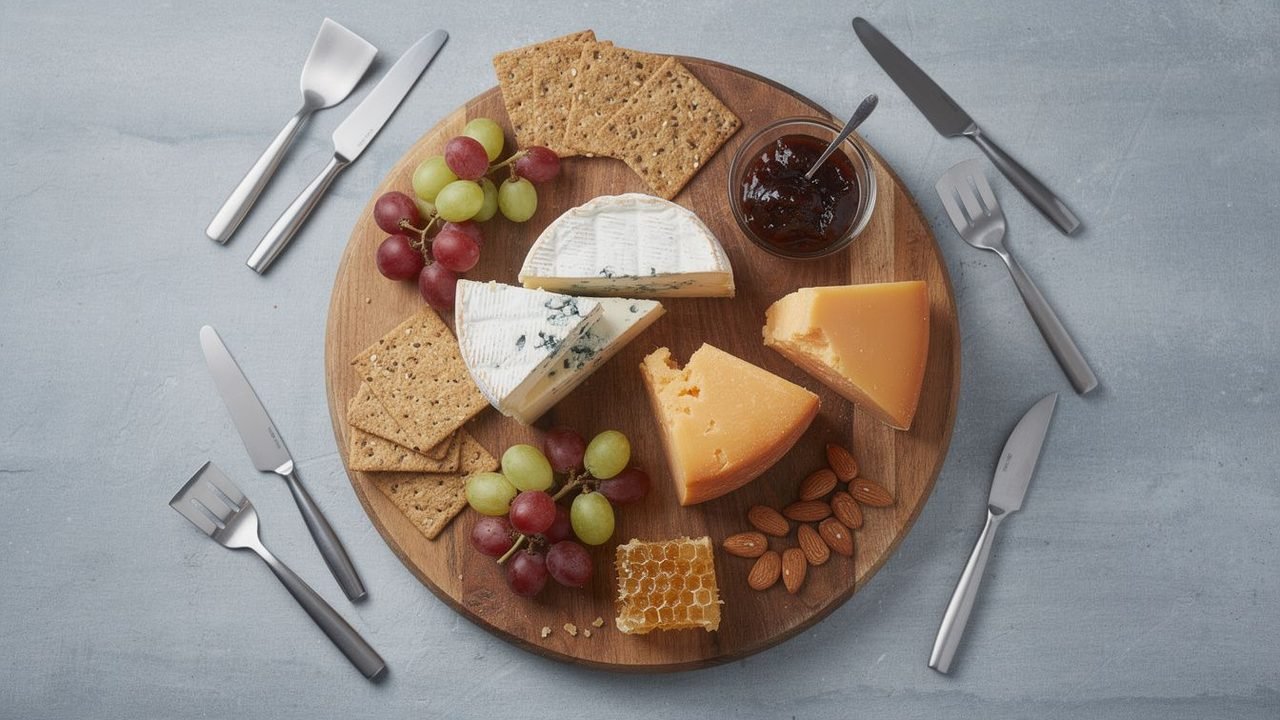
A cheese board is one of the easiest ways to feed a group, and one of the easiest to get wrong. Too many cheeses and the board turns into a confusing buffet. Too few accompaniments and people fill up on crackers. The good news is that a great board follows a simple formula, and once you know it you can build one in about twenty minutes with whatever looks good at the store.
Start with the cheese, and keep the number small
For most gatherings, three to five cheeses is the sweet spot. Three is plenty for a small group, and five gives a party enough variety without overwhelming anyone. More than that and the flavors start to blur together.
The trick is contrast. Pick cheeses that differ from one another in at least one or two of these ways:
- Texture: something soft and spreadable, something semi-firm, and something hard and crumbly.
- Milk: cow, goat, and sheep milk cheeses all taste distinct. Mixing them adds interest with no extra effort.
- Age: a young, milky cheese next to a deeply aged one shows off how much flavor time can build.
- Intensity: include at least one mild crowd-pleaser and, if your guests are adventurous, one bold option like a blue.
A dependable starter lineup looks like this: a creamy bloomy rind cheese such as Brie or Camembert, an aged cheddar or Gouda, a nutty Alpine cheese like Gruyere or Comte, a fresh goat cheese, and a blue such as Gorgonzola. Swap any of them for a local cheese you love.
Plan portions before you shop
Portions depend on what else is being served. As a rough guide:
- Appetizer before a meal: about 1 to 2 ounces of cheese per person.
- Cheese board as the main event: about 3 to 4 ounces per person.
Divide the total across your cheeses, buying a little more of the mild options and a little less of the strong ones. The blue almost always has leftovers. The aged cheddar almost never does.
Let the cheese warm up
Cold cheese tastes muted and feels waxy. Take the cheese out of the refrigerator 30 to 60 minutes before serving, keeping it wrapped until you build the board so the cut surfaces do not dry out. Soft cheeses benefit the most from this rest. On a hot day, or if your kitchen runs warm, lean toward the shorter end.
Choose accompaniments with a job to do
Every item on the board should either complement the cheese or give the palate a break. Think in four categories and pick one or two from each:
- Sweet: fig jam, honey or honeycomb, fresh grapes, sliced pears, dried apricots.
- Salty and savory: cured meats, olives, marinated artichokes.
- Crunchy: crackers, thin baguette slices, toasted nuts like almonds or walnuts.
- Sharp or acidic: cornichons, pickled onions, grainy mustard.
A few classic pairings are worth remembering. Honey and blue cheese balance each other beautifully. Aged cheddar loves crisp apple. Fresh goat cheese shines with a drizzle of good olive oil and cracked pepper. Gruyere is great with grainy mustard.
Keep crackers plain or lightly salted. Heavily seasoned crackers compete with the cheese instead of supporting it.
How to arrange the board
Arrangement is where a board goes from nice to impressive, and it is easier than it looks. Work in this order:
- Place the cheeses first. Space them out across the board so guests can reach each one from different sides. Put soft cheeses on the board whole, or with a first slice cut to invite people in.
- Add anything in a bowl. Jams, honey, olives, and mustard go into small dishes. Set them near the cheeses they pair with.
- Add the large items. Fold or ribbon cured meats, and fan out sliced fruit near the cheeses.
- Add crackers and bread. Tuck them along the edges or in loose rows. Keep some in reserve on the side so you can refill without rebuilding.
- Fill the gaps. Scatter nuts, grapes, and dried fruit into empty spaces. A full-looking board feels generous.
Cutting and serving tips
Give each cheese its own knife so flavors stay separate. A soft cheese knife or spreader works for Brie and goat cheese, a narrow blade suits semi-firm cheeses, and a short, sturdy knife breaks off chunks of hard aged cheese.
Pre-cut a few pieces of the harder cheeses. Guests are often shy about making the first cut, and a small pile of cubes or shards gets things moving. Cut wedges so that each piece includes a bit of the center and a bit of the edge, since flavor changes from rind to core.
As for rinds: bloomy rinds on Brie and Camembert are meant to be eaten, and many natural rinds are edible too. Wax, cloth, and hard plastic-like coatings are not. When in doubt, trim the rind off a few starter pieces.
Labels and small courtesies
Small labels with the name of each cheese help guests remember what they liked and make it easy to avoid anything they cannot eat. If someone at the party avoids gluten, keep a separate stack of gluten-free crackers on its own plate so crumbs do not travel.
What to do with leftovers
Rewrap leftover cheese in fresh cheese paper or parchment and refrigerate it. Odds and ends become the best possible mac and cheese, a stellar grilled cheese, or a savory frittata the next morning. A good cheese board, in other words, keeps giving long after the party ends.